We offer both secure POP3 and IMAP connections to our email accounts.
NOTE: If you are using Google Apps, click here for instructions on how to set up your email client instead.
The POP3 setup procedures are as follows:
Choose your email client:
Outlook | Windows Mail | Apple Mail | IPhone
-
- Open Outlook.
- Click the Tools menu, and select Account Settings…
- On the E-mail tab, click New…
- If you are prompted to Choose E-mail Service, select POP3 (or IMAP if you prefer that) and click Next.
- Fill in all necessary fields to include the following information:
Your Name: Enter your name as you would like it to appear in the From: field of outgoing messages.
Email Address: Enter your full email address ( ).
Password: Enter your email password.
Manually configure server settings or additional server types: Check this boxand then click Next
-
- Verify your User Information, and enter the following additional information:
Server Information
Account Type: POP3 (Or you can choose IMAP here but note that the IMAP SSL port would be 993)
Incoming mail server: login2.pageprogressive.com
Outgoing mail server (SMTP): login2.pageprogressive.com
Logon Information
User Name: Enter your email username (including @yourwebsite.com).
Password: Enter your email password.
Require logon using Secure Password Authentication (SPA): Leave this option unchecked.

- Click the More Settings… button, and select the Outgoing Server tab.
- Check the box next to My outgoing server (SMTP) requires authentication and select Use same settings as my incoming mail server.

- Click the Advanced tab, and check the box next to This server requires an encrypted connection (SSL) under Incoming Server (POP3).
- In the Outgoing server (SMTP) box, enter 465, and select TLS from the drop-down menu next to Use the following type of encrypted connection:.
- Click OK.
- Click Test Account Settings… After receiving ‘Congratulations! All tests completed successfully’, click Close.
- Click Next, and then click Finish. YOU”RE DONE!


Windows Mail Configuration
-
- Open Windows Mail.
- Click the Tools menu, and select Accounts…
- Click Add…
- Select Email Account, and click Next.
- Enter your name as you would like it to appear in the ‘From:’ field of outgoing messages, and click Next.
- Enter your full email address ().
- Fill in all necessary fields to include the following information:
Incoming mail server type: POP3 (Or you could elect to use use IMAP instead but the port number is 993)
Incoming mail (POP3 or IMAP) server: login2.pageprogressive.com.
Outgoing e-mail server (SMTP) name: login2.pageprogressive.com
Outgoing server requires authentication: enabled

- Click Next, and enter your full email address (including ‘@yourdomain.com’) and your email password.

- Click Next, and then check the box next to Do not download my e-mail at this time. Click Finish.
- On the Internet Accounts screen, make sure that your login2.pageprogressive.com mail account is selected, and click the Properties button.
- On the Advanced tab, enter 465 in the in the box next to Outgoing mail (SMTP), and check the box next to This server requires an encrypted connection (SSL).
- Check the box next to This server requires an encrypted connection (SSL) under Incoming mail (POP3). The box next to Incoming mail (POP3) should automatically update to 995.

- Click OK. You’re done! Close the Internet Accounts window and click Send/Receive to start checking your email messages.


Apple Mail Configuration:
-
- Open Apple Mail.
- Click on “File” from the Mail menu in the top toolbar.
- Click on the “Accounts” tab.
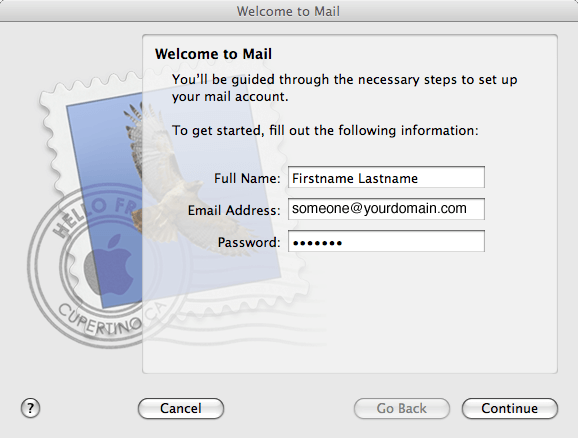
- A new pane will open for you to set up your new account. (See below)

- Fill in your Firstname and Lastname.
- Enter your name and full email address.
- Type in your password.
- Click “Continue.”
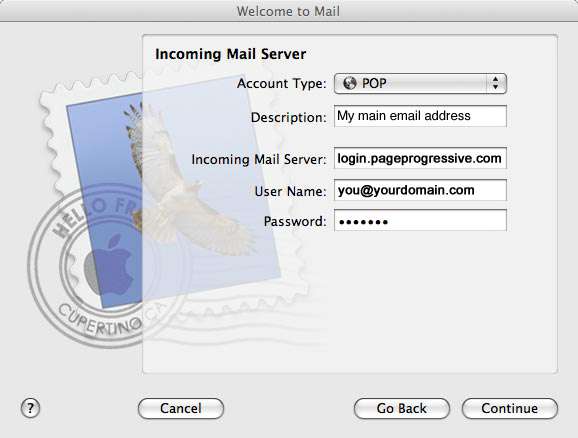
- Select the email account type “POP”
- Add a description, i.e.: My mail email address
- Set the incoming mail server to login2.pageprogressive.com
(If you see a mention of incoming port number, make sure that is set to 995, and it uses encryption). - Enter your full email address under username and the password for your email account.
- Click “Continue”
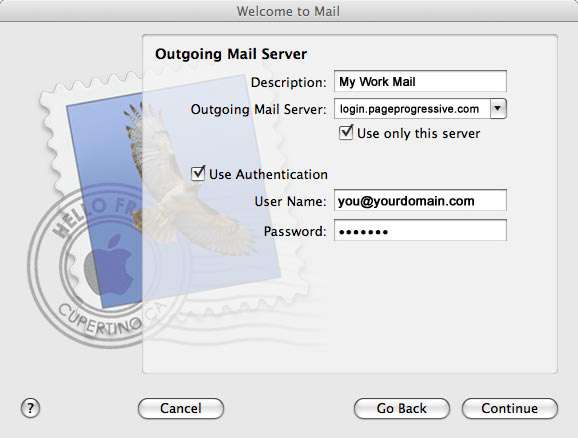
- Set the outgoing mail server to login2.pageprogressive.com
Make sure “Use Authentication” is checked.
Enter your full email address under username and your password.
Click “Continue.“ - Click on the “Account Information” tab.
- Click within the “Outgoing Mail Server (SMTP)” drop-down box.
- Click on “Edit Server List.“
- Click within the “Outgoing Mail Server (SMTP)” drop-down box.
- Click “Add Server.“
- Set the server port to 465
- Click continue and then test out the settings and see if you can both send and receive new mail
Iphone Settings:
Phone systems change fairly rapidly, so the instructions and screens may vary a little but the screenshots below should give you a basic idea of what to do.
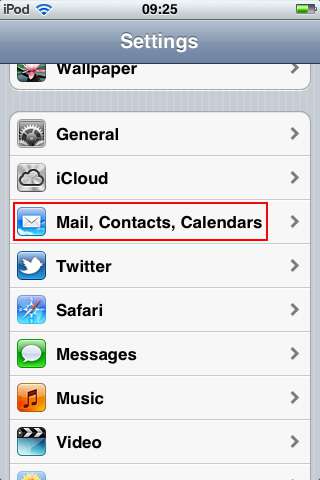
- First go to “Settings” on your iPhone and Click “Mail, Contacts, Calendars:”

- On the next screen choose the mail account you want to modify and then click on “Account.” On the next screen enter this info:
- Mail Account type: IMAP
- Host Name: login2.pageprogressive.com (and enter port “993“)
- Make sure to enter your FULL email address as your username and then your password
- Turn ON “SSL”
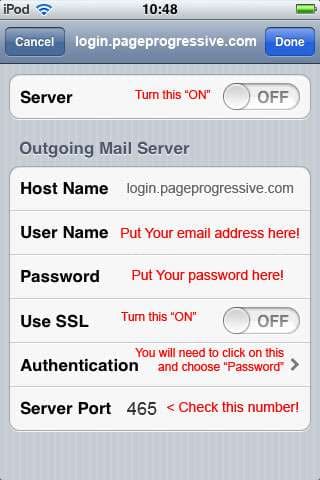
- This is the settings for your outgoing “SMTP” mailserver which you may see further down on the screen, or previous screen: